Metal Roof Screw Placement
Key Takeaways
- Correct screw placement keeps water out, preserves structural strength, and helps your roof last for decades whether you’re a weekend DIYer or a full-time pro.
- For exposed fastener panels, the modern standard is the flat unless the panel manufacturer specifies the rib for that particular profile.
- A practical planning figure is about 20 screws per square (100 square feet), but panel width, profile (such as 5-rib or corrugated), substrate, and local wind zone ultimately determine your spacing.
- The fastener is as important as the location. Use a quality self-drilling screw with an ethylene propylene diene monomer (EPDM) washer for a lasting seal.
- Follow the manufacturer’s installation guide, avoid over- or under-tightening, and bring in a qualified local installer if anything is unclear.
Why Proper Metal Roof Screw Placement Is Important
Metal roofing and siding systems can take a beating, but fasteners decide whether that toughness holds up year after year. Precision is paramount because panels expand and contract with temperature fluctuations and are exposed to wind, rain, snow, and sun. Screws in the right place, such as into the right substrate, separate a tight, long-lived roof from an ongoing leak hunt.
Miss the mark, and problems stack up: water collects around the head, washers never seat correctly, over-torque distorts the panel, and screws can back out as metal moves. Those small annoyances are actually early warning signs of failure. A clear layout for screw placement protects the building and the budget.
As the e-commerce arm of Mid-Michigan Metal Sales, a respected North American manufacturer of metal building components, we’ve seen thousands of installs go right, and a few go sideways. Finding the right supplies is part one of the job; putting them where they belong is part two. We’ll help with both, so your project stays on track.
The Big Debate: Metal Roof Screws on Rib or Flat?
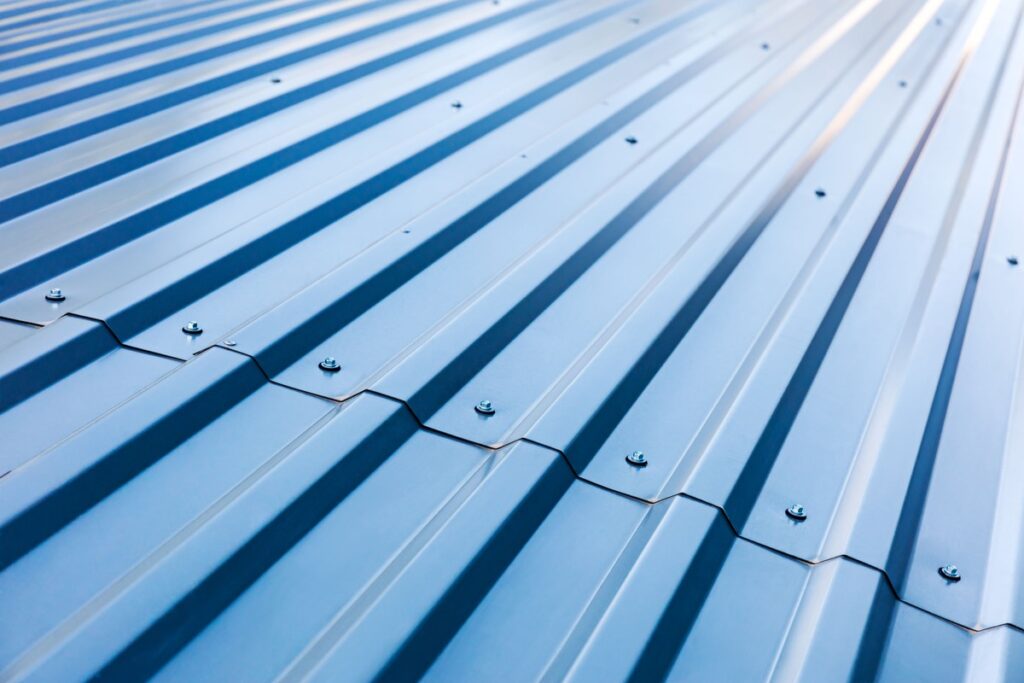
If you’ve researched metal roof installs, you’ve met the question: rib or flat? To clarify, the rib (or crest) is the raised portion of the profile, and the flat (or valley) sits between ribs. Here’s how the approaches compare so you can follow the correct method for your specific panel.
Screwing in the Flat: The Modern Standard
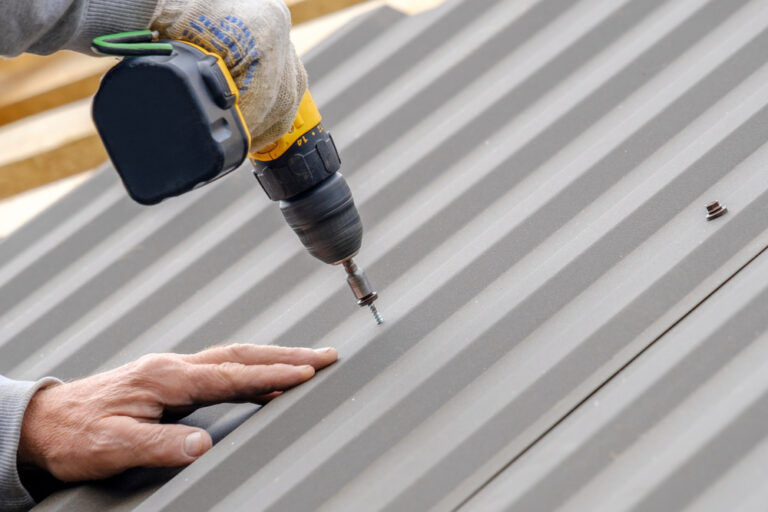
For most exposed fastener systems, such as R-Panel, PBR, and many corrugated profiles, fastening in the flat is the current best practice. The flat lands over solid wood decking or a purlin, so the screw threads into firm backing. That support lets the ethylene propylene diene monomer (EPDM) washer compress evenly for a full-circle seal and increases pull-out resistance during wind uplift.
Some worry that water running across the flats might find a path around the head, but with a properly seated, high-quality screw and an intact EPDM washer, that concern doesn’t hold up. The solid backing beneath the flat strengthens the connection and maintains consistency through heavy rain and seasonal temperature swings.
Screwing in the Rib: When and Why Some Roofers Do It
You may still see installers fasten through the rib on certain legacy corrugated profiles to keep the head high and away from the main water path. It can work when it matches the manufacturer’s instructions for that exact profile and substrate.
The tradeoffs are significant. Without solid backing under the rib, the screw can lean as it’s driven, stretching the hole outside the washer’s coverage and breaking the seal. Unsupported ribs also reduce pull-out strength in strong winds. The standing rule is simple: follow the panel manufacturer’s guide. If it calls for the rib, use the rib; if it calls for the flat, use the flat.
Where to Put Screws in Metal Roofing: Spacing by Panel Type
Spacing isn’t one-size-fits-all. The right schedule depends on profile, substrate (wood or steel), and local conditions. Your manufacturer’s instructions always come first, but these guidelines help you plan quantities and layout before you stage materials.
Standard Screw Spacing Rules
A common baseline is one screw every 24 inches along the panel length, vertically. For estimating counts, many crews plan about 20 screws per square (one square equals 100 square feet). That planning number helps you order with confidence and avoid running short partway through the job.
Panel ends at the eave and ridge need a denser pattern than the interior field. Those zones experience the highest wind uplift and require additional fasteners to keep panels anchored.
Placement by Panel Type
Different profiles call for different patterns. Use this quick reference to set up your layout, then confirm the details in the manufacturer’s guide.
- 5-rib panels: Place screws beside each rib. This typically works out to one screw per rib, every 24 inches vertically, for five screws per row across the width. For metal-to-wood installs, see Fastgrip #10 Hi-Lo MINI-DRILLER EPDM Washered Metal Roofing/Siding Fasteners.
- Corrugated 7/8 inch: For roofing, fasten on the high (crest); for siding, fasten on the low (valley). Spacing is often every third corrugation, but confirm with the manufacturer’s guide. For wood framing, see #11 PG Hi-Lo EPDM Washered Metal Roofing/Siding Fasteners.
- R-Panel and PBR panel: Fasten in the flat next to the major rib. At panel ends, use five panel screws plus one lap screw per line; in the interior, use three panel screws plus one lap screw per line. Place lap screws at the sidelap, 12-18 inches on center. For metal-to-metal structural connections, see #12 MetalGrip Self Drilling Roofing/Siding Fasteners Steel to Steel.
High vs. Mild Wind Zones
Geography raises the stakes. In milder regions, fastening every other rib or corrugation is often enough. In coastal areas, mountain corridors, or regions with hurricane-level gusts, more work is required: fasten every rib and reduce vertical spacing to increase pull-out resistance and diaphragm strength.
Corners and edges always get more fasteners regardless of the general zone because they see the worst uplift during storms. Use the manufacturer’s load tables and local code as your final word for patterns in your area.
Choosing the Right Metal Roofing Fasteners
Even perfect placement can fail if the screw can’t hold a seal. Low-grade fasteners and aging gaskets commonly cause leaks. Here’s what to look for and what Supply Maverick keeps ready for contractors and DIYers across the US, Canada, Australia, and New Zealand.
The Importance of EPDM Washers
The washer under the head does the sealing. EPDM rubber compresses against the panel, forming a full-circle barrier around the fastener hole. That small ring stands between your roof and the weather.
Older neoprene gaskets degrade under UV exposure and temperature cycling. Quality EPDM holds its elasticity through freeze-thaw swings and full sun. That’s why options like #11 PG Hi-Lo EPDM Washered Metal Roofing/Siding Fasteners use dependable EPDM washers you can trust.
Self-Tapping vs. Self-Drilling Screws
Self-tapping screws need a pilot hole. Self-drilling screws (often called Tek screws) feature a drill-point tip that bores through metal as you drive them. For most metal roofing work, self-drilling screws speed installation, keep holes aligned, and reduce swarf that can rust and stain panels.
Supply Maverick stocks choices for both major substrates. For metal-to-wood connections (panels to wood purlins or decking), see Fastgrip #10 Hi-Lo MINI-DRILLER EPDM Washered Metal Roofing/Siding Fasteners. For metal-to-metal (panels to steel purlins or stitch screws at sidelaps), #12 MetalGrip Self Drilling Roofing/Siding Fasteners Steel to Steel deliver the bite you need.
Color-Matched Fasteners: The Finishing Touch
On exposed fastener roofs, screw heads are visible from the ground, so color is a consideration. You don’t want bright dots scattered across a dark panel or vice versa, so Supply Maverick offers color-matched roofing screws in 40-plus in-stock colors.
Our colors match Supply Maverick’s own panel and trim finishes. Choose the same shade as your panels and trims to keep a clean, uniform look without guesswork.
Wholesale Pricing, Bulk Orders, and Net 30 Accounts
Contractors and purchasing teams need reliable supply and flexible terms. Supply Maverick offers wholesale pricing and bulk-quantity discounts to help keep project budgets in check. Qualified businesses can apply for Net 30 accounts for online purchases to keep cash flow steady on larger jobs.
We also move fast. Most orders placed before 12 p.m. EST ship the same day, helping you stay on schedule. With global shipping, we serve customers in the US, Canada, Australia, and New Zealand.
5 Common Metal Roof Fastening Mistakes to Avoid
These five errors cause the majority of callbacks, leaks, and early failures, and each one is easy to avoid with a little care.
- Over-tightening the screw: Drive it too deep, and you crush the EPDM washer. It can split or squeeze out beyond the panel edge, breaking the seal. Use a torque-controlled drill or a driver set to the manufacturer’s recommended RPM.
- Under-tightening the screw: If the washer isn’t snug, water can get through the gap. Aim for slight, even compression so it’s sealed but not flattened.
- Driving screws at an angle: Each screw should be perpendicular to the panel. Angling creates uneven compression, breaks the all-around seal, and can stress the panel until it cracks.
- Leaving metal shavings on the panel: Self-drilling screws create swarf. If it stays on the roof, it quickly develops rust and stains the paint. Sweep panels at the end of each work day.
- Skipping lap screws and sealant tape: Sidelaps need stitch or lap screws and butyl tape. Without both, capillary action can pull water into the seam, and wind can lift the edges.
When to Call a Professional
Since Supply Maverick makes sourcing the right hard-to-find fasteners and accessories simple, many homeowners and experienced DIYers can complete their own metal roofing and siding installs. With the correct screws, a solid manufacturer guide, and careful technique, you can achieve results that last.
If your project involves complex roof geometry, engineered wind requirements, or large commercial scopes, it’s time to bring in a qualified local roofing contractor. Supply Maverick provides premium materials, but for installation direction beyond what a manufacturer outlines, a licensed professional is the right partner.
Final Thoughts on Metal Roof Screw Placement
For most exposed fastener panels, placing screws in the flat, following the profile’s spacing pattern, and using quality EPDM washered screws turns a good install into one that performs for decades. Once you understand the layout and the reason behind it, the process becomes straightforward.
Whether you’re stocking up for a big job or grabbing materials for a weekend project, Supply Maverick has the hard-to-find roofing fasteners you need with same-day shipping on most orders placed before 12 p.m. EST. Explore our full lineup of roofing fasteners and keep your project moving.