How to Screw Down Metal Roofing: Placement Patterns and Spacing Guide
Key Takeaways
- Start with 24” on center (O.C.) along framing for most exposed-fastener roofs, then tighten to 12” to 18” at edges, corners, and higher-wind zones per the panel manufacturer’s load tables and your local code.
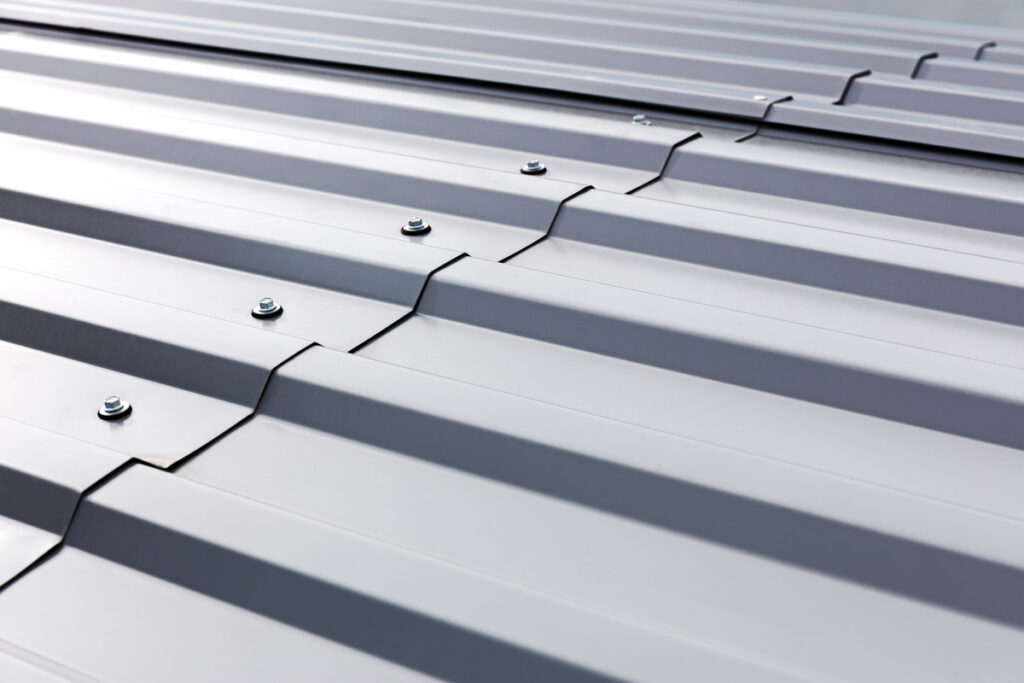
- On modern profiles, set screws in the flat beside the major rib for better sealing and stronger pull-out. The typical exception is 7/8″ corrugated roofing, which is commonly fastened on the rib.
- As a planning shortcut, budget about 80 screws per roofing square (100 square feet), then refine the total using the panel’s tables and zone enhancements.
- Don’t overdrive. The sealing washer should be snug and uniformly compressed (never smashed flat or bulging), and fasteners must be installed straight, not at an angle.
- Panel profile and gauge, substrate (wood or steel), roof shape and pitch, eave height, and local wind exposure all influence spacing and pattern.
- Supply Maverick ships most orders placed before 12 p.m. EST the same day and stocks hard-to-find parts, including oversize #14 FastGrip Replacement Metal Roofing/Siding EPDM Washered Screws, profile-specific foam closures, pipe boots, and more — all at wholesale pricing with bulk discounts to keep bids competitive.
Get the fastener layout right, and a metal roof stays tight, dry, and locked in against the wind. Miss the details, and you can end up chasing leaks, panel flutter, and warranty headaches. This guide walks you through placement, spacing, and technique so you can plan your fastener count, lay out clean lines, and drive every screw with confidence.
Why Proper Screw Placement Is Key
Fasteners do more than hold panels down; they determine wind uplift resistance, watertightness, and the roof’s service life. Each washer functions like a gasket — over-compress it and you risk tearing or deforming the seal; under-compress it and you leave a leak path.
Spacing and placement work together: Too few fasteners, or fasteners driven in the wrong spot, can let panels ripple, oil-can, or even peel during a storm. Too many in the wrong places can dimple the sheet, raise the risk of leaks, and still fail to add real holding strength. A sound pattern saves money, protects your building, and keeps warranties intact.
Metal Roofing Fastener Spacing Standards
Most exposed-fastener systems land between 12” and 24” O.C. along purlins or framing, with 24” O.C. used frequently under typical conditions. In higher-wind exposures, at roof edges and corners, or with lighter-gauge panels, spacing often tightens to 12” to 18” O.C.
Certain structural profiles on stout substrates in mild zones may allow up to 36” O.C., but only when approved by the panel’s span and load tables and your local code.
For estimating, a practical rule of thumb is about 80 screws per roofing square (100 square feet). A 2,000-square-foot roof, for example, would start with around 1,600 screws — then refine that number based on the actual profile, support spacing, and any edge or corner zone enhancements required by code or the manufacturer.
Spacing isn’t one-size-fits-all. It shifts with real-world variables that affect load, pull-out strength, and water control.
- Panel gauge and profile strength: Lighter gauge panels have less bending resistance and need more fasteners.
- Substrate: Wood purlins, steel purlins, and decked roofs like oriented strand board (OSB) or plywood all deliver different pull-out values.
- Roof geometry and pitch: Steeper slopes and complex shapes change how loads distribute, often requiring tighter patterns at edges and focal points.
- Eave height and exposure: Taller eaves see stronger wind interaction that can drive closer spacing in edge and corner zones.
- Local building codes and wind/seismic zones: Always check your jurisdiction’s requirements before finalizing a fastener plan.
- Manufacturer testing and warranty limitations: Panel-specific load tables and warranty terms set the ceiling on allowable spacing.
Always confirm details with the specific panel’s installation guide and load charts, and double-check with your local building department. If wind design is a significant concern, bringing in a structural engineer early to set the right pattern pays for itself.
Screw Placement: Rib vs. Flat
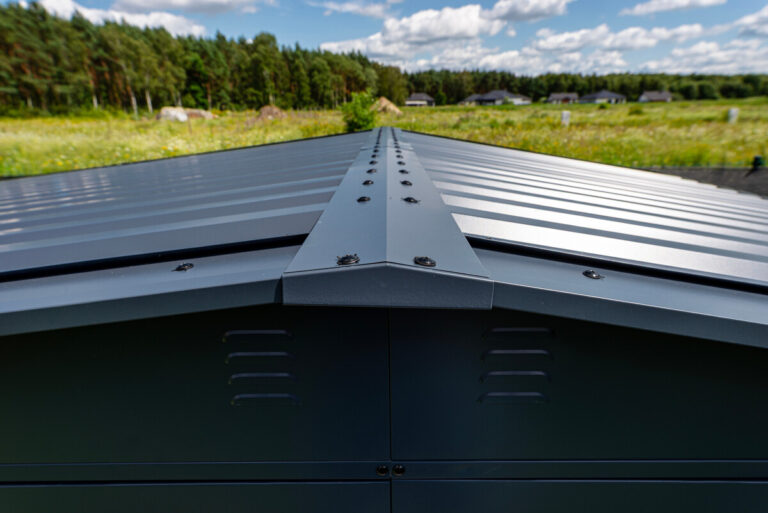
Decades ago, many installers aimed for the rib to keep fasteners up out of water. With today’s exposed-fastener screws and modern sealing washers made from ethylene propylene diene monomer (EPDM) or neoprene, best practice for most panel types is to drive screws in the flat beside the major rib.
The flat delivers several advantages:
- The washer seats flush and seals evenly on a flat surface.
- Pull-out strength is more consistent because the screw bears directly into the framing or deck.
- Reduced flex under the washer lowers long-term stress on the fastener and gasket.
- The seal tends to stay uniform through years of thermal movement.
Ribs curve and flex, which can distort the seal and stress the screw over time. One widely used exception is ⅞” corrugated roofing, where panel screws typically go in the high of the corrugation, with side-lap screws installed along the overlap at regular intervals.
Fastener Spacing by Panel Type
Each profile has its own pattern. Use these field-tested norms as a starting point, then confirm exact on-center distances and zone enhancements with your panel’s documentation and local code.
7/8 ” Corrugated Panels
Corrugated is the classic deep-wave sheet. For roofing applications, many manufacturers call for fasteners in the high (peak) to keep them above water flow, combined with side-lap screws that cinch the overlap.
- Typical panel pattern: Four panel screws per screw line, placed on every third corrugation along the support.
- Side-lap screws: 12” to 18” O.C. along the lap.
- Panel widths: Coverage varies (often 37” versus 39”), which changes the overall fastener count and layout. Follow your panel’s guide for exact on-center spacing and any edge or corner enhancements.
At eaves, ridges, and corner zones, patterns usually tighten to resist uplift. Keep chalk lines true, and pre-drill when it helps maintain alignment through multiple sheets.
R-Panel and PBR Panels
R-Panel and purlin-bearing rib (PBR) profiles are mainstays for farm buildings, shops, and residential outbuildings. PBR includes a purlin-bearing leg (PB leg) that reinforces the overlap and reduces rib crush during fastening.
- Panel screws: Typically installed in the flats beside the ribs.
- Ends at eave and ridge: Five panel screws plus one lap screw per screw line is common.
- Interior supports: Three panel screws plus one lap screw per screw line is common.
- Side-lap screws: 12” to 18” O.C.
Gauge, rib depth, and eave height can shift the final pattern. Confirm end-zone enhancements and O.C. spacing with the profile’s tables and code official before you order fasteners.
7.2 Panel (Western Rib)
The 7.2, also called Western Rib, uses deep, structural ribs for strength and a bold look. Fasteners typically land in every panel low (valley), not on the rib.
- Common pattern: Five panel screws plus one lap screw per screw line.
- Side-lap screws: 12” to 18” O.C.
Deeper ribs can span longer distances on intermediate supports, but edge and corner zones still require tighter spacing to meet uplift limits. Use the manufacturer’s load tables to finalize the layout.
Six Factors Affecting Your Fastener Spacing
Here’s why one roof can use 24” O.C. while another needs 12” to 18” in key zones.
- Panel thickness (gauge): Thinner sheet often calls for closer spacing; heavier gauges can sometimes span farther between fasteners.
- Material type: Aluminum and steel behave differently for stiffness and pull-out; aluminum panels may need tighter patterns.
- Profile depth and geometry: Deeper ribs add stiffness and may allow wider spacing than shallow or low-profile panels.
- Substrate type: Steel purlins typically deliver higher pull-out values than wood, and wood often holds better than OSB or plywood overlays. Substrate drives both screw choice and pattern.
- Roof shape, pitch, and eave height: Steeper slopes, tall eaves, and complex shapes concentrate wind loads, pushing spacing tighter at edges, corners, and ridges.
- Geographic location: Coastal regions, hurricane corridors, mountainous or open-terrain sites, and snow country often require closer spacing per local code and engineering.
Step-by-Step Installation Guide
Good prep and a repeatable process keep lines straight, fasteners square, and washers consistent.
Preparation and Layout
A clean layout is half the battle. Whether you’re a contractor running a full crew or a DIYer with a helper, the goal is straight lines, square panels, and consistent overhangs. Here’s a field-proven sequence to keep you on track.
- Confirm the deck or purlins are sound, flat, and properly spaced per the panel manufacturer. Reinforce or replace questionable framing before you start.
- Snap a square baseline at the eave with a framing square and chalk line so the first course sets the roof’s alignment.
- Dry-fit the first panel and set the eave overhang (commonly 1 to 1-1/2″). Adjust until it’s perfectly true to your baseline.
- Pre-drill if the profile or finish calls for it, using the correct bit size for the screw shank. Pre-drilling helps maintain straight fasteners and exact spacing through multiple sheets.
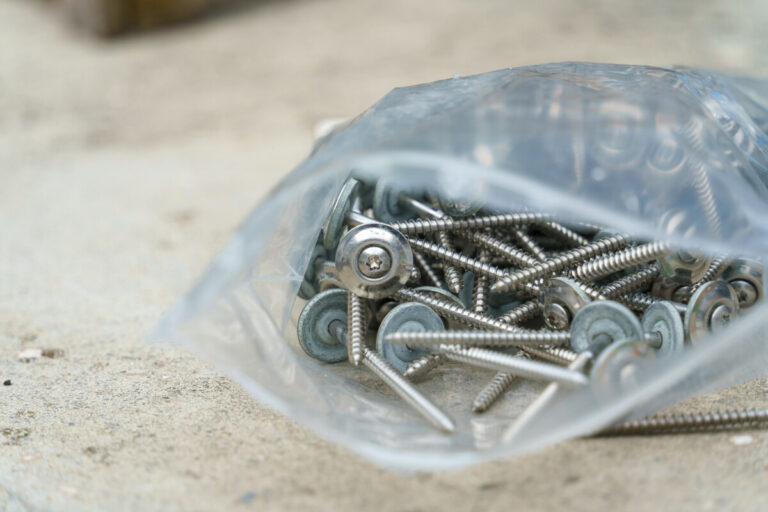
- Stage fasteners, closures, and tools on the roof: roofing screws with EPDM washers, lap screws, foam closures, butyl tape, and a torque-controlled driver with the correct socket.
- Install profile-matched foam closures at eaves and ridges to block wind-driven rain, bugs, and debris. Use closures cut for 7/8″ corrugated, R-Panel/PBR, or 7.2 profiles as needed.
- Verify your color selections if you’re using painted fasteners so heads blend with panels and trims from the same finish family.
- Re-check the first two panels for square and straight. If the first course wanders, the whole run will show it.
Driving the Fastener
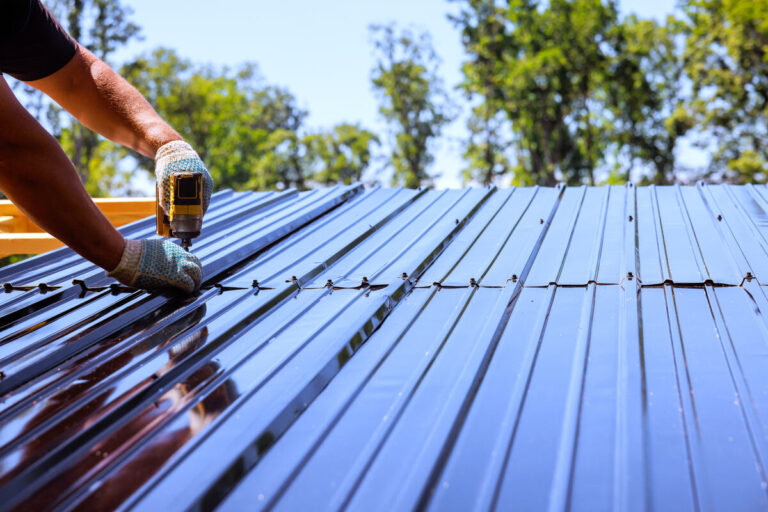
Driving fasteners clean and perpendicular is the best way to ensure a tight seal and a long-lasting roof. Follow this sequence for consistent results:
- Place each screw correctly: for most panels, target the flat next to the major rib; for 7/8″ corrugated roofing, drive in the high; add side-lap screws where specified.
- Hold the driver perpendicular to the panel so the screw doesn’t enter at an angle. Angled screws distort washers and compromise the seal.
- Use a torque-limiting driver or a low clutch setting and test on scrap. Increase torque only until the washer seats uniformly.
- Stop when the EPDM washer is snug and evenly compressed beneath the metal washer. Don’t crush the rubber or dimple the panel.
- Keep spacing consistent: 24” O.C. as your baseline, then tighten to 12” to 18” at edges and corners to satisfy the panel tables and code.
- Install side-lap screws at 12” to 18” O.C. Use butyl tape or sealant in the lap on low-slope roofs (below about 3:12) if the manufacturer specifies it.
- After each panel, sight down ribs and the eave line. Correct drift right away before stacking errors compound.
Achieving Proper Compression
The most common leak point on an exposed-fastener metal roof is a washer that’s either too loose or crushed. Use this quick check to catch problems before they become callbacks.
- Inspect the washer. It should be uniformly flattened just enough to seal, without bulging past the metal washer.
- Check for a dish or dimple around the screw head. If present, you’ve overdriven; back it out and replace with a fresh screw.
- Wiggle the head lightly with the driver socket. If it spins or feels spongy, the fastener may be underdriven or stripped. Adjust torque or use an oversized replacement screw.
- Spot-check several screws on every panel. Consistency beats speed, and small misses here often turn into leaks later.
Common Installation Mistakes to Avoid
Pressure, deadlines, and ladders can invite errors. Keep these pitfalls off your job.
- Incorrect placement (rib vs. flat): Most modern panels want fasteners in the flat; 7/8″ corrugated is the common roofing exception that takes screws on the high.
- Overdriving fasteners: Smashed washers and panel dimples shorten gasket life and can open leak paths.
- Underdriving fasteners: A loose washer leaves micro-gaps for capillary water entry.
- Angled or crooked screws: The washer can’t seat evenly, which leads to uneven compression and early leaks.
- Inconsistent spacing: Wandering from chalk lines reduces wind resistance and can void warranties.
- Wrong screw type for the substrate: Metal-to-wood screws in steel purlins, or vice versa, won’t hold as designed and may strip out.
- Skipping side-lap sealant on low slopes: Capillary action draws water into unsealed laps.
- Skipping pre-drilling when advised: This leads to misaligned runs, burrs, and finish damage.
- Ignoring edge and corner zone enhancements: These zones see the highest uplift and often need tighter spacing.
- Disregarding the manufacturer’s guide: Panel-specific requirements control fastener count, placement, and warranty coverage.
Choosing the Right Fasteners for Your Project
Screws aren’t all the same. Match the fastener to your panel, substrate, climate, and finish so the roof stays tight and dry.
- Substrate match: Use metal-to-wood screws for wood framing or decks and metal-to-metal screws for steel purlins or light-gauge framing. Never mix them.
- Length: Account for corrugation depth if you’re fastening in a high, add the substrate thickness, include two to three thread lengths for full bite, and consider the washer stack to pick the right length.
- Protective coating: In coastal or corrosive environments, step up to higher-grade coatings or stainless options.
- Washer quality: Premium EPDM washers offer excellent weather resistance when compressed correctly and haven’t been crushed.
- Head style and drive: Hex-head roofing screws give solid engagement and reduce cam-out when you’re running thousands of fasteners.
- Paint and appearance: Painted heads help hide fasteners and add UV protection. Choose a color that matches the panel family for a clean finish.
Here are practical examples for common scenarios.
- #10 Hi-Lo metal-to-wood roofing screws with EPDM sealing washers: A high-quality go-to for attaching exposed-fastener panels to wood framing or sheathing. They bite fast and seat washers consistently.
- #12 MetalGrip T5 metal-to-metal screws: Built for heavy-duty steel-to-steel connections and synthetic-underlayment-to-steel applications. They aren’t for polyvinyl chloride (PVC) roofing. They’re ideal for strong thread engagement in steel purlins.
- #14 FastGrip Replacement Metal Roofing/Siding EPDM Washered Screws: Oversized replacements that re-bite in stripped or enlarged holes without moving to a different substrate repair.
- Foam closures (profile-specific): Seal panel highs and lows at eaves, ridges, and transitions. Supply Maverick stocks closures matched to 7/8″ corrugated, R-Panel/PBR, and 7.2 profiles to stop wind-driven rain, insects, and debris.
- Pipe boot flashing: Flexible EPDM or silicone boots that conform around round penetrations for a watertight seal on vents and stacks.
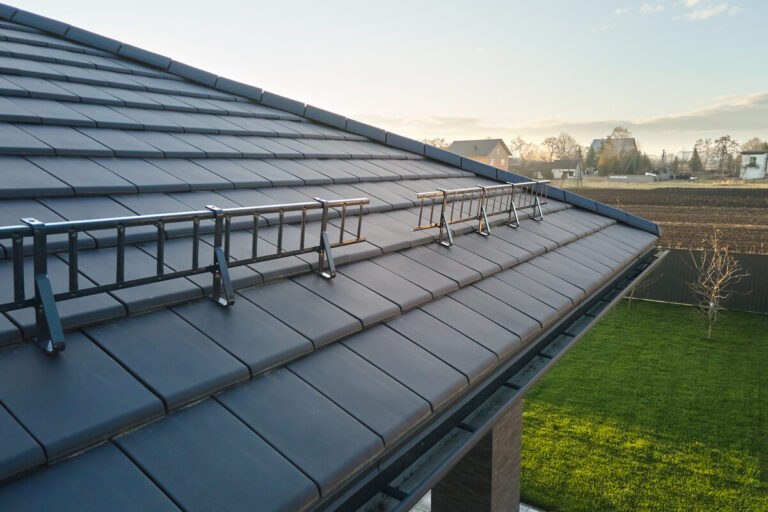
- Snow guards (e.g., Snow Defender series): Control snow and ice release to prevent dangerous rooftop avalanches that can rip out fasteners or damage gutters.
Need fasteners in a hurry? Supply Maverick keeps a deep inventory of hard-to-find roofing screws, lap fasteners, closures, and accessories ready to go. Most orders placed before 12 noon Eastern ship the same day, and wholesale pricing with bulk-quantity discounts keeps your numbers sharp. Net 30 accounts are available for qualified businesses to simplify purchasing.
Troubleshooting Metal Roof Leaks Around Screws
If you’re tracking down a drip, start with fasteners and washers. Thermal cycling, ultraviolet (UV) exposure, and minor installation errors often reveal themselves months later.
- Backed-out screws: Expansion and contraction can loosen fasteners, especially if they were underdriven or angled. Replace with a new screw or step up to an oversized option like #14 FastGrip Replacement Metal Roofing/Siding EPDM Washered Screws for a fresh bite.
- UV-degraded washers: Old or low-quality washers can harden and crack. Replace the fastener with a premium EPDM washered screw and verify torque settings during install.
- Stripped holes in wood or metal: The wrong screw type or over-tightening can damage the substrate. Use an oversized replacement screw matched to the substrate, or consider a rivet nut or repair anchor where loads and assemblies allow.
- Crooked or overdriven screws: Angled entries and crushed washers don’t seal. Pull and replace with a straight, correctly torqued fastener. If the hole’s enlarged, use an oversize screw.
- Wrong metallurgy or coating: Corroded fasteners can leak or fail. Upgrade to appropriate coatings or stainless where conditions demand, and replace compromised fasteners in the affected area.
While you’re on the roof, inspect side laps for missing lap screws, deteriorated sealant, and gaps in foam closures. Small fixes in these areas often solve lingering leaks on low-slope runs and windward edges.
Conclusion
The formula for a reliable exposed-fastener roof is straightforward: follow the panel manufacturer’s tables, tighten spacing in edge and corner zones, set screws in the flats on most modern profiles, and drive each fastener straight with a properly seated EPDM washer. Do those things, and you get a dry, durable system that lasts
Before running the full field, lay out a test panel and drive a short row. Check every washer; if they all look the same (snug, even, and not bulging), you’ve dialed in your torque and technique. From there, repeatability comes easy.
When you need the right hardware, Supply Maverick is your metal roofing and siding supply source. We stock specialized, hard-to-find fasteners and accessories you won’t find at big-box stores, such as profile-matched foam closures, lap screws, pipe boots, snow guards, and oversize replacements like #14 FastGrip Replacement Metal Roofing/Siding EPDM Washered Screws.
Most orders placed before 12 p.m. EST ship the same day. We serve customers across the US, Canada, Australia, and New Zealand, and our goal is simple: to provide access to premium, hard-to-find items at prices that won’t break the bank. If you need help selecting fasteners or accessories for a specific panel and substrate, reach out with the product name or SKU — we’re here to help. Backed by the manufacturing expertise of Mid-Michigan Metal Sales, we’re ready to help you get the roof done right the first time.
References
- International Code Council. “Model building codes and references.” ICC. 2024, August 2026. https://codes.iccsafe.org/codes/i-codes/2024-icodes
- Build Using Steel. “Cold-Formed Steel Framing.” Build Using Steel, August 2026. https://www.buildusingsteel.org/build-using-steel/cold-formed-steel-framing/