The Ultimate Guide to Snow Guards: Types, Costs, Installation & Buying Tips
Key Takeaways
- Snow guards hold back snow on a sloped roof so it melts or releases in small amounts rather than as one heavy sheet.
- Pad and bar are the two most common styles, with fence-style systems covering the heavier end of the load range. Attachment method is a separate decision from style: most guards bond with adhesive or bite in with a mechanical fastener, while standing seam roofs also support clamp-on hardware.
- Material costs run roughly $3 to $100 per unit or linear foot depending on style, while a full professional install typically lands between $1,000 and $4,000.
- Roof pitch and rafter length decide how many rows you need and how far apart to space them.
- The attachment method matters as much as the style, because some fasteners can affect your roof’s manufacturer warranty.
- The most common (and costly) buying mistake is a guard that’s undersized or poorly spaced for the roof. A close second is relying on adhesive-only hardware in a heavy snow region.
Snow guards prevent roof avalanches by stopping snow from sliding off a metal roof in one heavy, dangerous sheet, but they only work as well as their installation allows. The two most common types of snow guard are pad and bar style, and they have very different applications. Installing the wrong type can increase the risk of roof avalanches rather than prevent them, so it’s important to understand how your roof’s pitch and rafter length affect which style you need. Proper attachment methods are equally important for strength and the product’s useful life, and because certain installation methods can void the roof’s manufacturer warranty. Always follow the manufacturer recommendations for guard spacing and, when in doubt, or when dealing with an especially steep roof pitch or heavy snow region, call in an engineer.
What Snow Guards Are and Why Your Roof Might Need Them
Snow guards solve one very specific problem: uncontrolled snow shedding off a smooth panel. Understanding why that happens makes buying decisions easier, and it also tells you whether your particular roof needs a system in the first place.
The Problem With Smooth Metal Panels
A metal roof sheds snow differently than a shingle roof does. Because the panel surface is smooth and non-porous, snow doesn’t melt off gradually the way it does on rougher materials. It builds up, then lets go all at once, and an entire winter’s accumulation can slide off in one heavy sheet without warning.
That’s a roof avalanche, and it’s the actual problem snow guards solve. Bent gutters, crushed shrubs, dented vehicles, and a dangerous drop zone below the eaves all stem from the same event. It’s a familiar problem for homeowners across the western mountain states and the upper Midwest. New England deals with it too, and so does any commercial property manager with a walkway or loading dock under a metal roofline.
How Snow Guards Actually Work
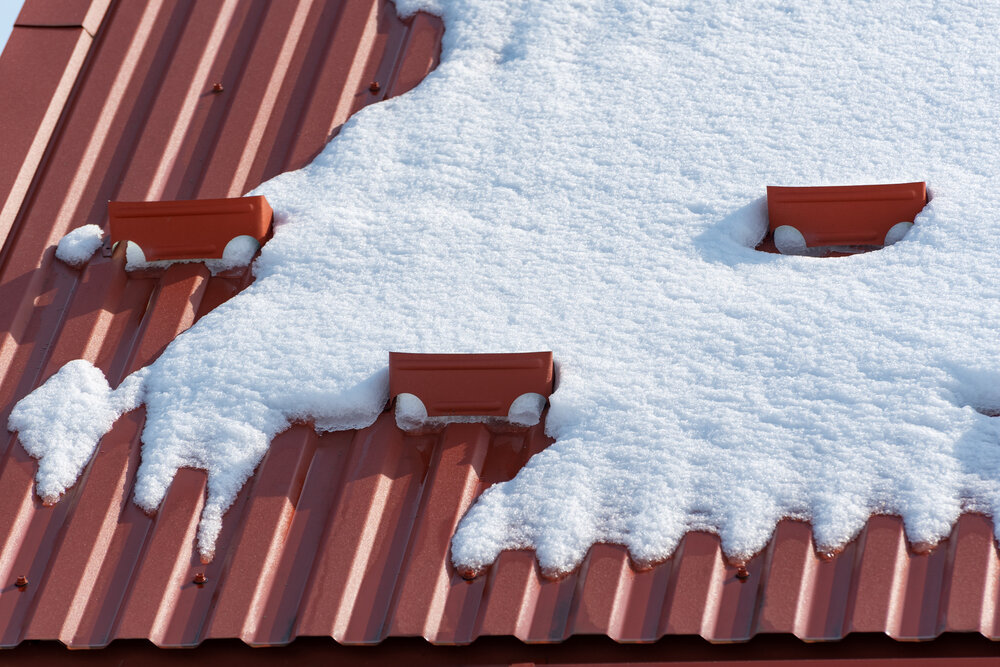
Snow guards break the snowpack into smaller sections before it can build enough momentum to slide as one mass. A well-placed system doesn’t stop snow from ever leaving the roof. It just makes sure that snow comes down in manageable amounts, on a timeline that doesn’t put anyone underneath it at risk.
Do You Actually Need Them
Not every roof needs them, though. On roofs with a pitch under 3:12, snow tends to sit and melt in place rather than slide, according to spacing guidance compiled by InspectAPedia, a construction and building-diagnosis reference. Very steep roofs, above roughly 12:12, often shed snow quickly and in smaller amounts before it accumulates to dangerous levels. The real sweet spot for snow retention sits in between, generally 3:12 to 9:12, in regions that see meaningful annual snowfall. If your roof and climate fall into that range, a properly sized system is worth the investment.
Types of Snow Guards
Most guides stop at style. Style matters, but attachment method matters just as much, and it’s the piece buyers overlook most often. The breakdown below covers both, plus how to match a system to the roof it’s actually going on.
Pad-Style (Individual) Guards
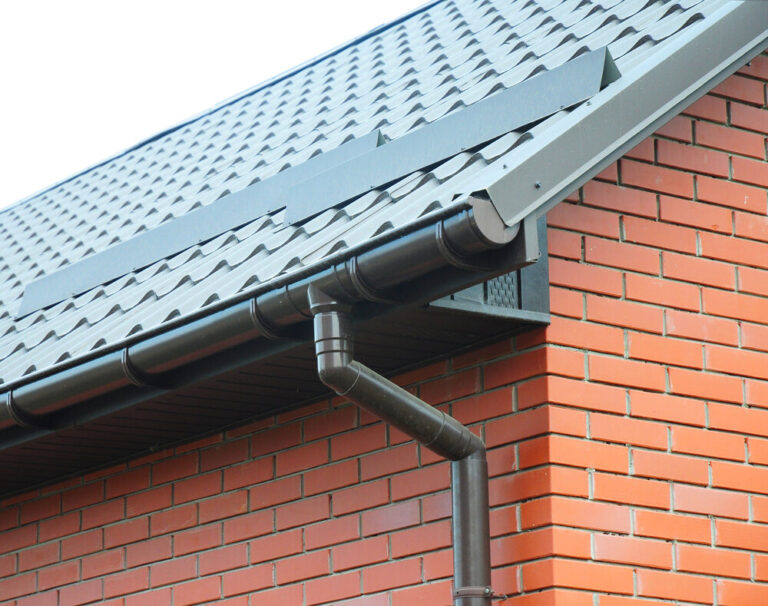
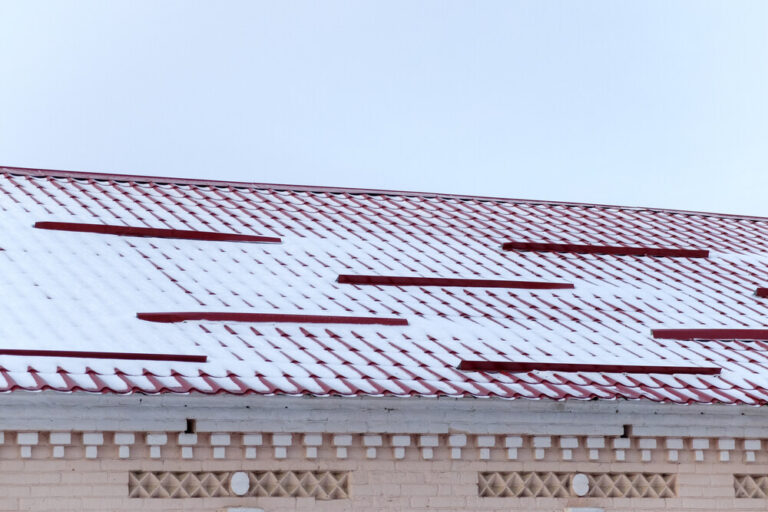
Pad-style guards are small, individually placed units spread across the roof in a staggered pattern. Each one holds back a modest amount of snow directly around it rather than forming one continuous barrier. They’re the least visually intrusive option and the easiest to retrofit onto an existing roof, though a full-coverage layout does require more individual units than a continuous system.
Bar-Style (Rail) Guards
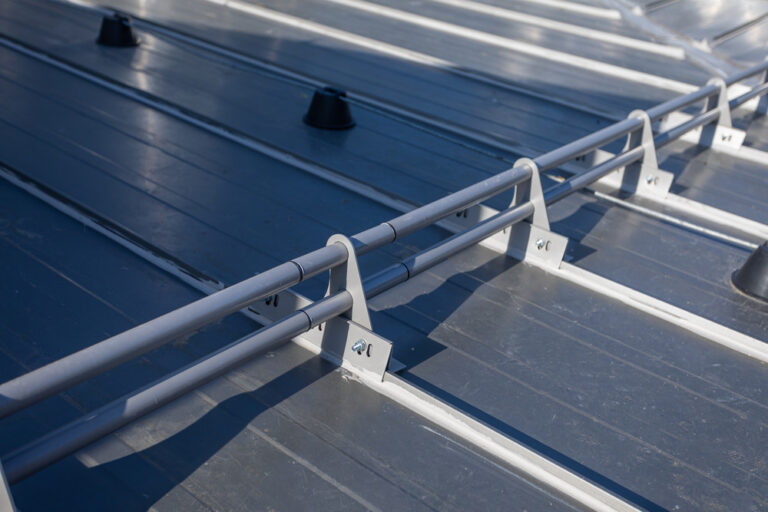
A bar-style system runs one continuous horizontal bar across the width of the roof, which catches snow along the entire run instead of at scattered points. This is the most common choice for standing seam metal roofs, partly because manufacturers offer color-matched finishes that blend into the panel color rather than standing out against it. Depending on snow load, you might need only a single row, or you might add a second row higher up the slope.
Fence-Style Guards
Fence-style systems use multiple vertical tubes mounted in a row, and the result looks more like a fence than a bar. They sit taller and hold more volume than pad or bar styles, making them the choice for heavy snow-load regions or steep pitches where a single low-profile bar wouldn’t hold enough. The tradeoff is visibility. A fence system is noticeable from the ground in a way a color-matched bar typically isn’t.
How They Attach to the Roof
Adhesive-mounted guards bond directly to the panel with no fasteners, which means no punctures. They’re the easiest option to add after the fact, though they generally carry a lower load rating. Mechanically fastened guards use screws or bolts that penetrate the panel into the structural deck below, which adds holding strength at the cost of a puncture point. Clamp-on systems strike a balance on standing seam roofs. Instead of penetrating the panel, a clamp grips the vertical seam itself, giving you a mechanical connection without a hole through the metal.
Matching the Guard to the Roof Type
Standing seam and exposed-fastener metal roofs both support the full range of styles, though clamp-on hardware is typically reserved for standing seam because it needs a seam to grip. Asphalt shingle and slate roofs generally rely on individual pad-style guards fastened through the roofing material into the deck, since there’s no seam to clamp onto. Supply Maverick’s Snow Defender lineup is built specifically for standing seam and exposed-fastener metal roofing, which covers the majority of the roofs where sliding snow is a real hazard.
Snow Guard Materials
Material determines how long snow guards hold up under sun and repeated freeze-thaw cycles, as well as to corrosion. The options below sit at different points on the cost-versus-durability scale, and matching one to your climate matters more than picking a favorite finish.
Polycarbonate and Plastic
Polycarbonate is the budget-friendly entry point into snow retention. It’s UV-stabilized so it won’t degrade quickly in direct sun, and it holds up fine in light-to-moderate snow regions. Its ceiling is lower load capacity compared with metal options, so it’s a better match for milder climates than for heavy mountain snowpack.
Aluminum
Aluminum offers a strong strength-to-weight ratio and resists corrosion on its own, which is why it’s the material most commonly used in rail and bar systems. Powder coating or anodizing adds color options and a bit of extra durability against the elements.
Steel and Copper
Steel and copper sit at the premium end. Both handle the heaviest snow loads with room to spare, and both are a natural pairing for architectural metal roofing where the guard is meant to visually match, not just function. The higher price reflects both raw material cost and the extra manufacturing that goes into a heavier-duty product.
How Much Snow Guards Cost
Cost is where most buyers start, and it’s also where the numbers get misleading if you look at only one part of the project. Hardware price and labor cost move independently, and the total project cost depends on more than either one alone.
Price by Type
Pad-style guards run roughly $3 to $15 per piece depending on whether they’re plastic or metal. Bar-style sections tend to run $15 to $30 per linear foot for the hardware alone, sometimes climbing past $100 for premium color-matched sections on a longer run. Fence-style systems, with more material per linear foot, typically sit at the higher end of that same range or above it.
Material Cost vs. Labor Cost
The number on a product page only covers half the project. Labor for professional installation generally runs $5 to $30 per linear foot on top of the hardware, according to cost breakdowns compiled by Estimero, a construction cost-estimating platform. Clamp-on systems tend to sit at the lower end of that labor range since there’s no penetration to seal, while mechanically fastened systems that require drilling and sealing push toward the higher end.
Sourcing Your Own Materials
Plenty of contractors and confident DIYers buy the snow guards themselves and either install them personally or hand them to a roofer for install-only labor, which trims the total bill down to labor plus a smaller markup. That’s the appeal of ordering from a supplier that actually stocks the hard-to-find, specialized components big-box stores tend to skip. Supply Maverick ships most in-stock orders the same day when they’re placed before 12 p.m. EST and offers wholesale pricing and Net 30 terms for contractors buying in volume.
How Many Snow Guards You Actually Need
This is the part most cost-and-type articles skip entirely, and it’s arguably more important than either one. A guard that’s the right style and material still fails if there aren’t enough of them, spaced correctly. Getting the layout right is what actually determines whether the system holds up during a real storm.
The Variables Behind Snow Guard Layout
Roof pitch and regional snow load drive most of the layout decisions. Rafter length also factors in, though it’s the piece people forget to check. A longer rafter run means more total snow mass sliding toward any single row of guards, so a 34-foot rafter needs a different layout than a 16-foot rafter carrying the same snow load, even on an identical roof pitch.
Recommended Spacing and Row Placement
General industry guidance calls for staggered rows, with side-to-side spacing that tightens as roof pitch increases, per the layout standards referenced by InspectAPedia. First-row placement matters just as much as spacing. That row should sit at or above the exterior load-bearing wall rather than out past it, since guards placed beyond the wall line can add structural stress the framing wasn’t designed to carry.
When to Get a Site-Specific Layout
A rough estimate works fine for a straightforward gable roof in an average snow region. Commercial roofs and anything with unusual geometry are worth the extra step of paying for an engineered, site-specific layout. The same goes for any region with high ground snow load. It costs more upfront and saves you from guessing on a decision that affects roof safety.
What to Expect During Snow Guard Installation
Installation isn’t a single universal process, since it depends heavily on which attachment method a given system uses. What follows is a general sense of what a job actually involves, along with a straight answer on when doing it yourself makes sense.
Installation by Attachment Type
Clamp-on hardware for standing seam roofs installs fastest since there’s no drilling or sealing involved, just tightening a clamp onto the seam at the marked spacing. Mechanically fastened systems on exposed-fastener metal or shingle roofs take longer because each fastener point needs a pilot hole and a bead of sealant to stay watertight. Adhesive-mounted guards fall somewhere in between: quick to place, but they need a clean, dry, properly prepped surface for the bond to hold.
A Typical Install, Step by Step
- Mark the layout using the spacing pattern determined for the roof’s pitch and snow load.
- Confirm each mark lines up with a structural point. On metal roofs, that’s usually a seam or a rib; on shingle or slate, it’s the roof deck underneath.
- Attach each guard using its specified method. A clamp system just needs to be tightened onto the seam. A mechanically fastened or adhesive system needs the fastener sealed, or the bonding surface properly prepped, before it’s considered done.
- Check alignment and spacing across the full run before calling the job finished.
Can You Do It Yourself
A straightforward, accessible roof with a moderate pitch is well within reach for a confident DIYer, especially with clamp-on or adhesive systems that don’t require drilling. Steep pitches and tall structures are a different story, and so is any roof where a mechanically fastened system needs to be sealed correctly to avoid a leak. Getting it wrong there risks the roof itself, not just the snow guard. In those situations, a qualified local roofing installer is the safer call, and it’s worth mentioning your plans to whoever installed or will service the roof so nothing about the attachment method catches them off guard later.
Timing the Install
Snow guards can go on a brand-new roof or get retrofitted onto one that’s already been up for years. Either way, the ideal window is before the first real snowfall of the season, not after snow is already sitting on the roof.
Buying Tips for Choosing the Right Snow Guards
Getting the right style and material only solves part of the equation. A handful of buying decisions, like roof compatibility and warranty implications, separate a system that performs for decades from one that causes problems down the road.
Match the Guard to the Roof’s Panel Type
Not every snow guard fits every panel profile. A clamp built for a standing seam won’t have anything to grip on a corrugated or exposed-fastener panel, and a guard sized for shingle won’t seat correctly on metal. Confirming panel type before ordering avoids the most common and most expensive buying mistake in this category: hardware that arrives and simply doesn’t fit.
Check Load Ratings, Not Just Price
A snow guard’s allowable load is the tested ultimate load divided by a documented safety factor, and it tells you more than the price tag does. The Metal Construction Association recommends a safety factor of at least 2.0 for mechanically attached systems, a standard also referenced in metal roofing industry publications like Construction Canada. There’s no single American Society for Testing and Materials (ASTM) standard governing snow guard testing across the industry, so a manufacturer’s published test data and safety factor are what you actually have to go on.
Check Whether Installation Could Affect Your Roof’s Warranty
This one rarely comes up in buying guides, but it should. According to reporting from Construction Canada on metal roofing attachment methods, fasteners with a round, polished head are designed to dimple a standing seam without penetrating it, which keeps the attachment inside most metal roof manufacturers’ non-penetrating warranty clauses. Cup-tip fasteners, by contrast, are built to dig into the seam for extra holding strength, and that intrusion can breach the coating and potentially void the roof warranty. Before buying, confirm the attachment method against your roofing manufacturer’s warranty terms, and loop in a qualified local installer if you’re not sure how a given fastener interacts with your roof.
Aesthetics and Color-Matching
For homeowners who don’t want visible hardware breaking up a clean roofline, many bar-style and rail systems ship with a color-matched insert or finish designed to blend with the panel color rather than contrast against it. It’s a legitimate consideration if curb appeal matters as much as function, though it doesn’t change the load rating or attachment requirements underneath the finish.
Buy From a Source That Actually Stocks What You Need
A lot of buying frustration in this category comes down to availability, not design. Big-box retailers carry a narrow slice of what’s actually out there, which leaves buyers hunting across multiple sites just to find the right style and material, let alone hardware matched to their exact roof profile. Supply Maverick exists specifically to close that gap, carrying hard-to-find, specialized snow retention components including the Snow Defender line, built for standing seam and exposed-fastener metal roofs.
Supply Maverick operates as the e-commerce division of Mid-Michigan Metal Sales, a longstanding manufacturer in the metal building components industry, which is part of why the inventory runs deeper than what a general hardware store stocks. Orders placed before 12 p.m. EST typically ship the same day, wholesale and bulk pricing is available for larger projects, and Net 30 accounts are available to contractors who need to order now and pay later. Supply Maverick also ships to customers across the US, Canada, Australia, and New Zealand, so location isn’t a barrier to getting the right hardware.
Common Snow Guard Mistakes to Avoid
Watch for these buying and installation mistakes, since they show up again and again in failed systems. Most trace back to a shortcut taken in sizing or attachment decisions.
- Installing on a roof that doesn’t need them: a very low-slope or very steep roof usually doesn’t benefit from a system designed for the 3:12 to 9:12 range, and adding one anyway wastes money without solving anything.
- Under-sizing or under-spacing the layout: a system with too few guards or rows spaced too far apart simply fails at the one job it has, often during the exact storm it was meant to handle.
- Relying on adhesive-only guards in a heavy snow region: adhesive bonds hold up fine in light-to-moderate climates, but a serious snow load calls for a mechanically fastened or clamp-based system with a higher rated capacity.
- Placing the first row past the exterior wall: a first row set too far up the slope, beyond the load-bearing wall line, can add stress the roof framing was never designed to carry, alongside a higher risk of ice damming behind the guard.
Snow Guard Maintenance and Care
A snow guard isn’t installed and forgotten, at least not if you want it to last. A little seasonal attention catches small problems early, well before they turn into a failed system during the next big storm.
Post-Winter Inspection Checklist
Once the snow clears each spring, walk the roofline (or have someone qualified do it) and check that every fastener or clamp is still tight. While you’re up there, check the pads and metal guards for cracking or corrosion. It’s also worth confirming the layout still looks like the original install, since a heavy winter can shift individual units out of alignment even when nothing has actually failed.
Signs a Guard Needs Repair or Replacement
Cracked polycarbonate, rust forming on a metal bracket, a fastener that’s worked loose, or a guard that’s visibly bent from a hard winter are all signs it’s time to swap that unit rather than wait for it to fail completely.
Maintenance Differences by Material
Polycarbonate is the material most likely to need attention over time, since UV exposure eventually leads to cracking, even with built-in stabilizers. Aluminum needs very little beyond an occasional check that clamps haven’t loosened. Steel and copper sit at the low-maintenance end of the spectrum, generally needing little more than periodic fastener checks.
How Maintenance Affects Lifespan
A well-maintained snow guard system can last as long as the roof it’s mounted on. Most early failures trace back to neglect rather than a defective product. A loose fastener goes unnoticed for a season, or a small crack spreads under repeated freeze-thaw cycles, and the missed spring inspection is usually the real cause. Catching those small issues during a spring inspection is by far the easiest, lowest-cost fix available on this system.
Protect Your Roof Before the Next Storm
Getting snow retention right comes down to a few decisions working together. Start with the right style and material for your roof, then size the layout to your actual pitch and snow load. Confirm the hardware won’t void your roof’s warranty while you’re at it. Skip any one of those steps and the system underperforms exactly when you need it most.
If you’re ready to start sourcing hardware, Supply Maverick stocks the Snow Defender line and other hard-to-find snow retention components built for standing seam and exposed-fastener metal roofing, with same-day shipping on in-stock orders placed before 12 p.m. EST and wholesale pricing available for bulk orders.
Frequently Asked Questions
Do snow guards cause ice dams?
Snow guards themselves don’t cause ice dams, which typically form from inadequate attic insulation or ventilation. A guard installed too high up the slope, past the load-bearing wall, can contribute to conditions that worsen an existing ice dam risk, which is why first-row placement is crucial.
How long do snow guards last?
With proper installation and the periodic inspection covered above, a snow guard system can last as long as the roof itself. Material is the biggest variable in how quickly that changes.
Can snow guards be added to an existing roof?
Yes. Retrofitting an existing roof is common, and clamp-on or adhesive systems in particular are designed for exactly that scenario since they don’t require the roof to be under construction.
Do I need snow guards on an asphalt shingle roof, or only on metal?
Shingle roofs can shed snow avalanches too, just less dramatically than smooth metal panels. Pad-style guards fastened through the shingle into the deck are the standard choice for this roof type.
How often should snow guards be inspected?
Once a year, ideally right after the snow melts each spring, is enough for most residential systems. Commercial roofs or anywhere with a heavy snow load may warrant a mid-season check as well.